Why Your Tankless Water Heater Needs Regular Flushing
A tankless water heater flush is a maintenance process that removes mineral buildup from your unit's internal components using a descaling solution. Here's what you need to know:
Quick Answer for Tankless Water Heater Flush:
- What it is: Circulating vinegar or descaling solution through your unit to remove calcium and magnesium deposits
- How often: Once per year (every 6-9 months with hard water)
- Time needed: 45-60 minutes
- Cost: $100-$200 for DIY kit vs. $150-$350 for professional service
- Why it matters: Prevents efficiency loss, reduces energy bills, and extends unit lifespan
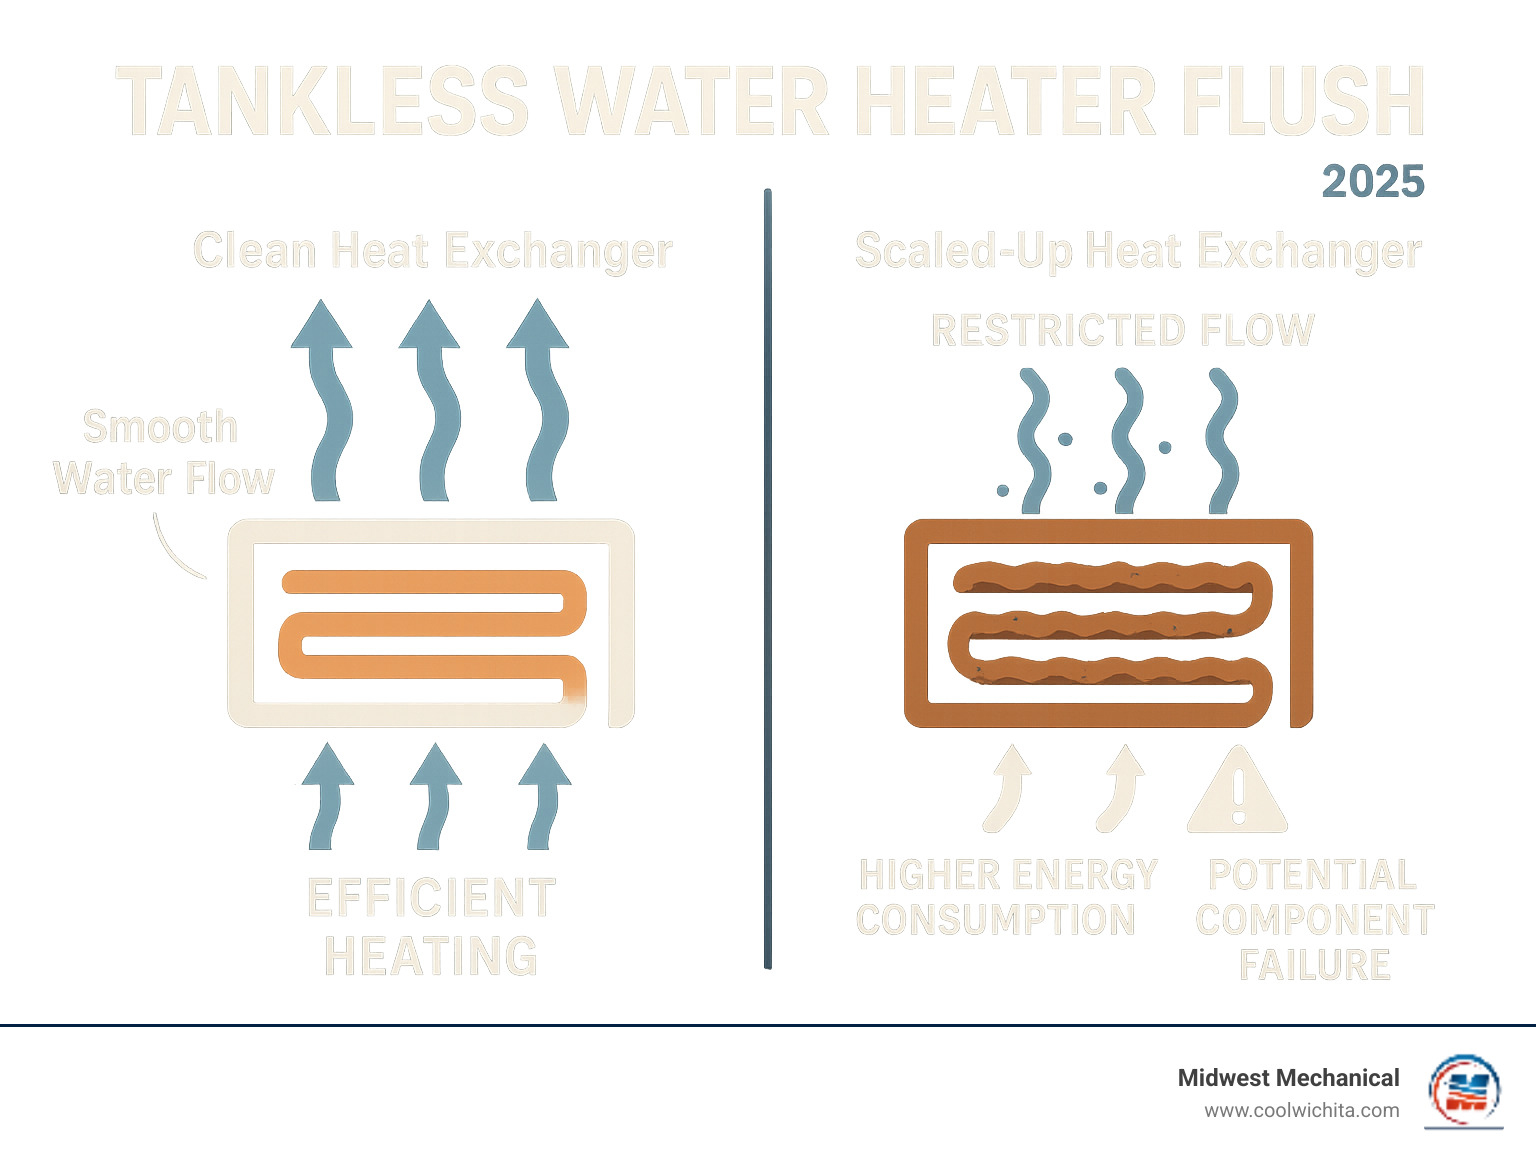
Your tankless water heater works hard to provide endless hot water on demand. But over time, minerals in your water - especially calcium and magnesium - build up inside the heat exchanger. This scale acts like a barrier, forcing your unit to work harder and use more energy.
The good news? Regular flushing can prevent this buildup and keep your system running efficiently.
When you flush your tankless water heater, you're essentially giving it a deep clean. The process removes mineral deposits that can reduce water flow, cause temperature fluctuations, and even lead to expensive repairs down the road.
Most manufacturers recommend flushing at least once per year. If you live in Wichita and have hard water (which is common in our area), you might need to flush every 6-9 months to prevent serious buildup.
The benefits are clear: improved efficiency, lower energy bills, and a longer-lasting water heater. Plus, regular maintenance can help us avoid those unexpected breakdowns that always seem to happen at the worst possible time.

Why and When to Flush Your Tankless Water Heater
Inside your tankless water heater, water flows through narrow tubes that heat it instantly. While it's amazing technology, one thing can cause problems: mineral buildup.
Every drop of water carries tiny amounts of calcium and magnesium. Over time, these minerals stick inside the heat exchanger tubes, creating scale. Much like the chalky buildup in a coffee pot, this scale becomes a serious problem in your water heater. When scale accumulates, your water heater works much harder. The mineral deposits act like insulation, making it difficult for heat to transfer to the water. This means reduced efficiency and higher energy bills.
If left unchecked, there's a real risk of corrosion from scaling that can seriously damage your unit, turning a simple maintenance issue into an expensive replacement.
Water hardness plays a huge role in how quickly this happens. The Wichita area has fairly hard water, meaning minerals build up faster. If you've noticed white spots on your dishes or soap that doesn't lather well, you've seen hard water in action.
Signs Your Water Heater Needs Flushing
Your tankless water heater will tell you when something's wrong if you know what to listen for. These warning signs start subtle but become more obvious over time.
Strange noises are often the first clue. Knocking, popping, or grumbling sounds happen when water heats up around mineral deposits.
Slower water heating is another red flag. You might notice it takes longer for hot water to reach your shower or sink. The scale buildup acts like insulation, making it harder for your unit to heat water efficiently.
Temperature problems are frustrating. If your shower goes from hot to cold, or if the water temperature fluctuates unpredictably, mineral buildup is likely interfering with the unit's ability to maintain steady heat.
Low water pressure from your hot water taps can also signal trouble. When scale builds up inside the narrow tubes, it restricts water flow, leaving you with weak water pressure.
Modern units often display error codes when they're struggling. These digital messages are your water heater's way of asking for help. Check your owner's manual to decode what your unit is trying to tell you.
How Often Should You Flush?
Most manufacturers recommend flushing your tankless water heater at least once a year. This preventive maintenance saves you money in the long run.
But water hardness changes everything. In areas with hard water like much of Wichita, Derby, and Andover, you'll want to flush more frequently—every 6-9 months is ideal. This is much easier than dealing with a broken unit.
If you have soft water (naturally or through a water softener), you can stretch the time between flushes to about 3-4 years. Even soft water carries some minerals, so don't skip maintenance entirely.
Always check your manufacturer guidelines. They know their units best and provide specific recommendations for your model. Following these guidelines also helps protect your warranty.
Your Step-by-Step Guide to a DIY Tankless Water Heater Flush
Think of flushing your tankless water heater like giving your car an oil change - it's one of those maintenance tasks that seems intimidating at first, but once you've done it, you'll wonder why you were so worried. A tankless water heater flush is totally doable as a DIY project, and you'll save money while keeping your unit running smoothly.

The whole process takes about 45 to 60 minutes from start to finish - roughly the same time as watching your favorite TV show. Before we dive in, let's talk safety. You'll be working with water, electricity, and possibly gas, so take your time and don't rush through any steps.
You can buy pre-made DIY flush kits that bundle everything together, but honestly, picking up the components separately often costs less and gives you exactly what you need.
Supplies Needed for a DIY Tankless Water Heater Flush
Here's your shopping list for tackling this project. Most of these items you can find at your local hardware store, and once you have them, you're set for years of maintenance.
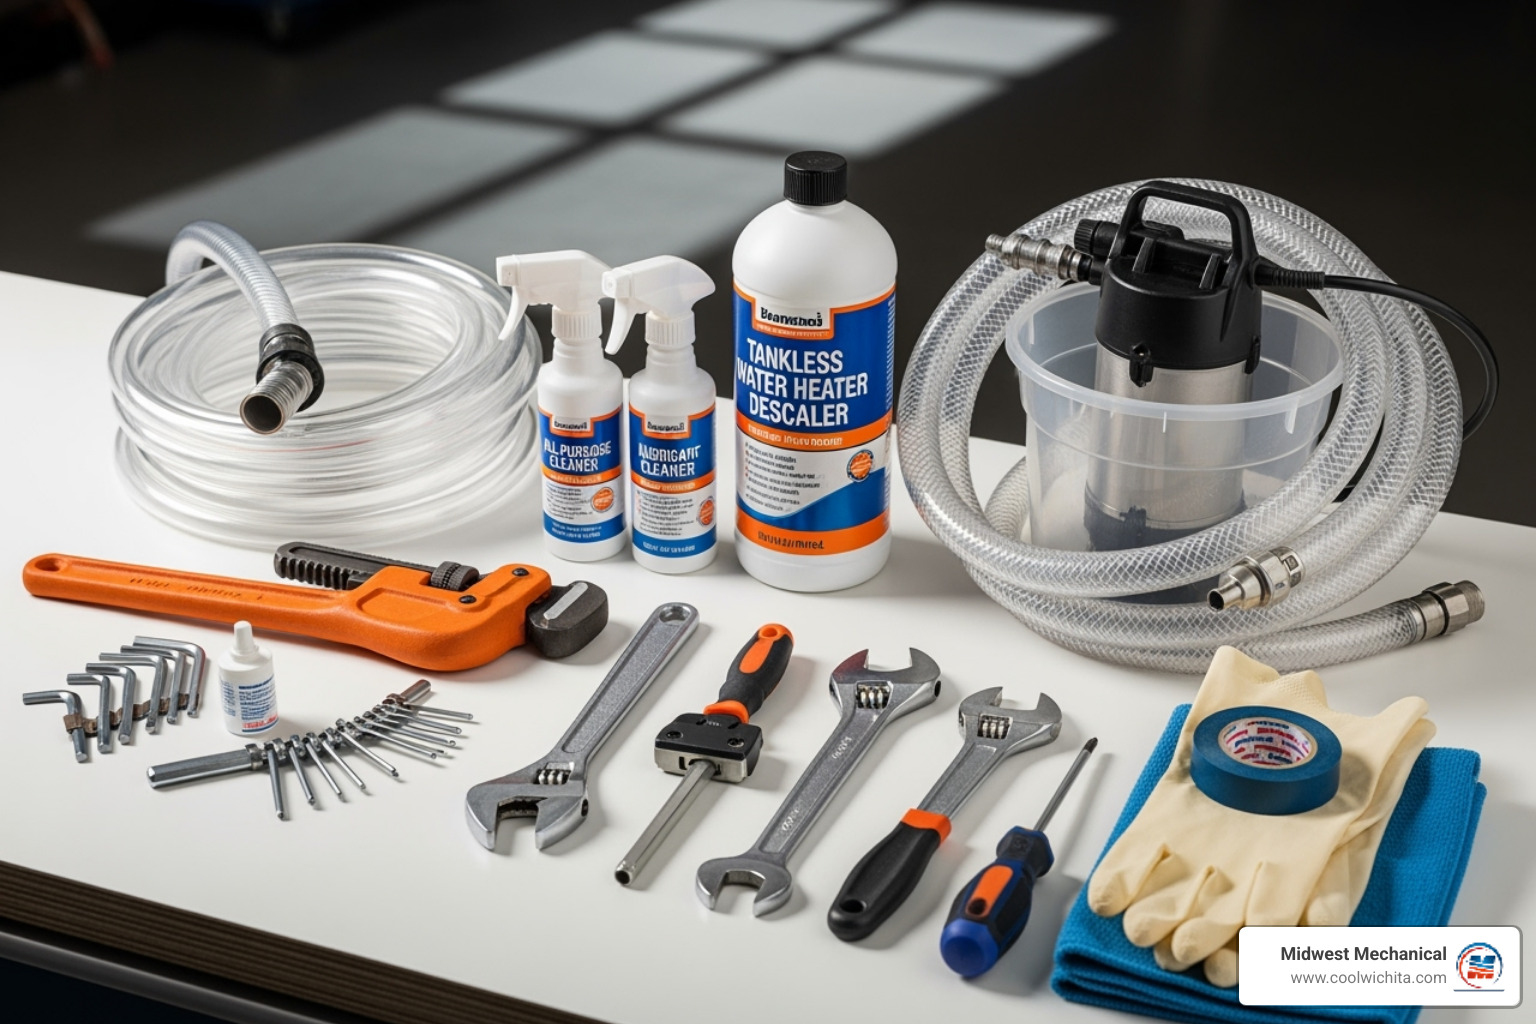
You'll need a 5-gallon bucket to hold your cleaning solution - any clean bucket will do. The submersible pump is your workhorse here; look for a small circulation pump rated at 1/6-HP to 1/4-HP. Two washing machine hoses work perfectly for connecting everything together - they're the right length and have the fittings you need.
For the actual cleaning, grab either white vinegar or a commercial descaling solution (we'll help you choose below). Don't forget gloves and safety glasses - your hands and eyes will thank you. Keep some towels handy for inevitable drips, and you'll want an adjustable wrench for tightening connections. Finally, have a clean cloth ready for wiping down the inlet filter.
The 9-Step Flushing Process
Ready to give your water heater some TLC? Here's how to do it right, step by step.
Step 1: Turn off power and gas. Safety always comes first. Head to your circuit breaker and flip off the power to your tankless unit. If you have a gas unit, find the gas supply valve (usually right next to the water connections) and turn it off too.
Step 2: Shut off water valves. Look underneath your unit for three water valves - two main lines for hot and cold water, plus sometimes a bypass line. Turn all of these off. You'll also see two small service valves with T-shaped handles - these are your new best friends for this project.
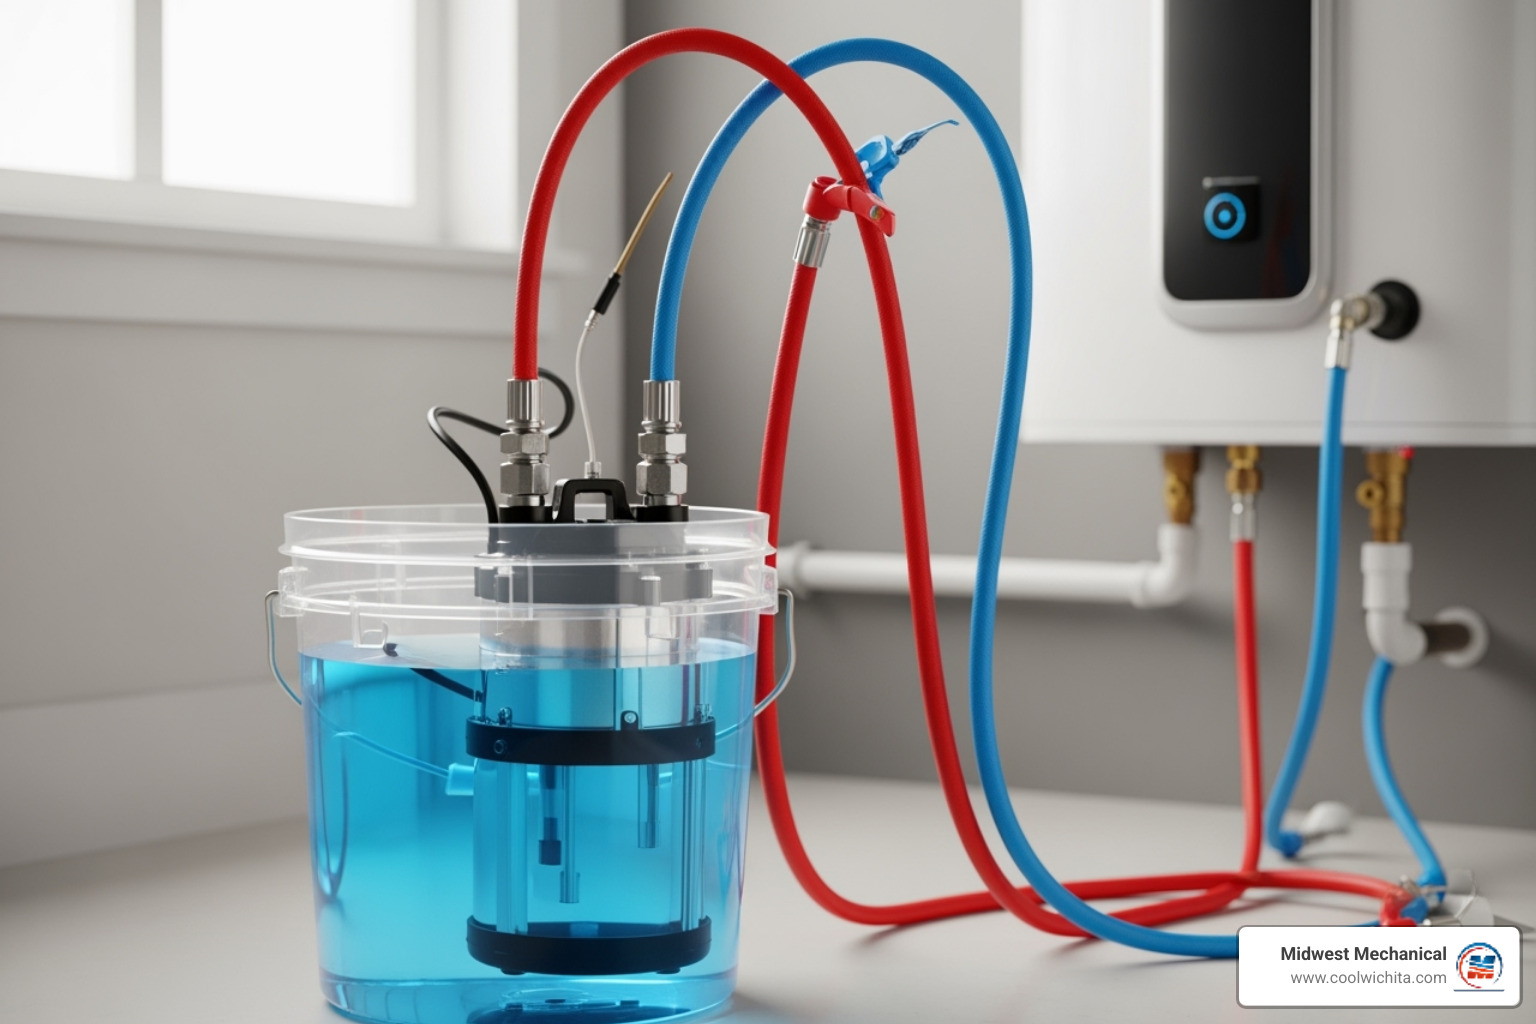
Step 3: Connect hoses to service ports. Here's where things get interesting. Carefully remove the caps from those service valves - expect a little water to dribble out, that's totally normal. Connect one washing machine hose to the cold water service port and the other to the hot water service port. Snug them up with your wrench, but don't over-tighten.
Step 4: Prepare descaling solution. Set your bucket below the unit. Connect the hose from the cold service port to your submersible pump, then drop the pump into the bucket. The hose from the hot service port goes into the bucket too. Now pour in your cleaning solution - you'll need about 2 to 4 gallons of undiluted white vinegar or commercial descaler.
Step 5: Circulate the solution. Open both service valves by turning those T-shaped handles so they're perpendicular to the main water lines. Plug in your pump and watch the magic happen. You should see the solution flowing from the bucket, through your water heater, and back again. Let this circulation do its work - timing depends on what you're using to clean (check our comparison table below).

Step 6: Flush with fresh water. Time to rinse away all that dissolved mineral buildup. Unplug your pump and close the service valves. Disconnect the hot water hose and point it toward a drain. Slowly open the cold water isolation valve to let fresh water flow through the unit. Run it for 3 to 5 minutes until the water runs completely clear.
Step 7: Clean inlet filter. While you're here, don't forget the inlet filter screen on the cold water side. This little screen catches debris and mineral particles. Give it a good rinse and scrub before putting it back.
Step 8: Disconnect and restore valves. Close all the service valves, disconnect your hoses, and replace the caps on the service ports. Firm is good, but don't crank them down too tight. Open your main hot and cold water valves.
Step 9: Restore power and gas. Turn the gas supply back on if you have a gas unit, then flip the electrical power back on at the breaker. Open a hot water faucet somewhere in your house and let it run until the water flows steadily - this pushes out any air bubbles.
Vinegar vs. Commercial Descaling Solution
Choosing between vinegar and commercial descaler is like choosing between a gentle daily cleanser and a deep-cleaning treatment. Both work, but they have different strengths.
White vinegar is the budget-friendly champion. It's incredibly inexpensive and you probably have some in your kitchen right now. As a mild acid solution, it's gentle on your system while still being effective at dissolving calcium and magnesium deposits. The trade-off? It needs more time to work - typically 1 to 2 hours of circulation. It's also very safe for your potable water system and poses minimal health risks.
Commercial descaling solutions are the heavy hitters. They cost more but pack stronger acids like citric acid in higher concentrations. This means they work faster - usually just 30 to 90 minutes of circulation time. They're especially effective for heavy buildup if you've been neglecting maintenance. Just remember to follow the safety instructions carefully, as they can be stronger than vinegar.
For your regular annual tankless water heater flush, vinegar is usually perfect. It's safe, cheap, and gets the job done. But if your unit hasn't been flushed in years and you suspect serious buildup, a commercial solution might save you time and give you better results. Whatever you choose, make sure it's designed for tankless water heaters and safe for drinking water systems.
DIY vs. Professional Flushing: Costs and Considerations
When it comes to a tankless water heater flush, you've got two main paths: rolling up your sleeves and doing it yourself, or calling in the professionals. Both have their place, and the right choice depends on your comfort level, budget, and specific situation.
The DIY route definitely wins on upfront cost savings. A basic flush kit will get you started, and once you own it, you can reuse it for years to come. You'll only need to replace the descaling solution for each flush. It's like buying a good set of tools - the initial investment pays off over time.
Professional service does cost more, but there's real value in that investment. Our certified technicians bring years of experience to your home. We've seen every type of tankless unit and know exactly what to look for. Plus, we carry insurance and warranties on our work, which gives you peace of mind that a DIY job simply can't match.
Here's something many homeowners don't realize: some manufacturers require professional flushing to keep your warranty valid. Before you decide to go the DIY route, check your unit's warranty requirements. The last thing you want is to save a few dollars on maintenance only to lose thousands in warranty coverage.
There's also the potential for error to consider. While our step-by-step guide is thorough, plumbing work can be unpredictable. A small mistake during a DIY flush could lead to leaks, damage, or even safety issues that end up costing much more than professional service would have.
Mistakes to Avoid During a Tankless Water Heater Flush
Even the most careful DIYers can run into trouble during a tankless water heater flush. Here are the most common mistakes we see - and they're all completely avoidable with a little awareness.
Forgetting to turn off power and gas tops our list of dangerous mistakes. This isn't just about protecting your equipment - it's about protecting you and your family. Always, always shut off the power at the breaker and turn off the gas supply before you start.
Overtightening connections is another biggie. We get it - nobody wants a leak. But cranking down too hard on those hose connections can actually damage the valve threads, creating the very problem you're trying to avoid. Hand-tight plus a quarter turn with a wrench is usually plenty.
Using the wrong cleaning solution can turn your maintenance day into a disaster. Stick to white vinegar or products specifically designed for tankless water heaters. That bottle of drain cleaner under your sink might seem like it would work great, but it can corrode internal components and contaminate your drinking water.
Not flushing thoroughly is like washing your hair but not rinsing out the shampoo. If you don't circulate the cleaning solution long enough, or skip the fresh water rinse, you'll leave behind scale deposits and cleaning residue. Your water heater won't perform properly, and you might taste vinegar in your hot water for weeks.
Skipping the inlet filter cleaning is like changing your car's oil but ignoring the air filter. That little screen catches debris and mineral particles, and if it's clogged, your freshly flushed system still won't work right.
When to Call a Professional
Sometimes the smartest move is knowing when you're in over your head. We're always here to help, and there are definitely situations where professional service is the way to go.
If you don't have isolation valves, a DIY flush becomes much more complicated. Many older installations lack the service ports that make flushing straightforward. We can install these valves for you, making future maintenance much easier.
If you're uncomfortable with plumbing tasks, there's no shame in calling the pros. Working with water, gas, and electrical connections isn't everyone's cup of tea, and that's perfectly fine.
Persistent error codes after flushing usually mean there's more going on than simple mineral buildup. Your unit might have a failing component or a more complex issue that requires professional diagnosis and repair.
Leaks during the process are a red flag to stop immediately. If water starts going where it shouldn't, shut everything down and give us a call. A small leak can quickly become a big problem.
Sometimes you simply don't have the time or energy for a DIY project, and that's completely understandable. Life gets busy, and weekends are precious. For expert assistance with your tankless water heater flush and complete peace of mind, contact Midwest Mechanical. Our certified technicians proudly serve Wichita, KS, and surrounding communities including Goddard, Kechi, and Valley Center.
Beyond the Flush: Other Essential Maintenance Tips
Think of your tankless water heater flush as just one part of keeping your unit happy and healthy. Just like your car needs more than oil changes, your tankless water heater benefits from a few other simple maintenance tasks that can help it reach that impressive 20+ year lifespan (often double what traditional tank heaters give you!).

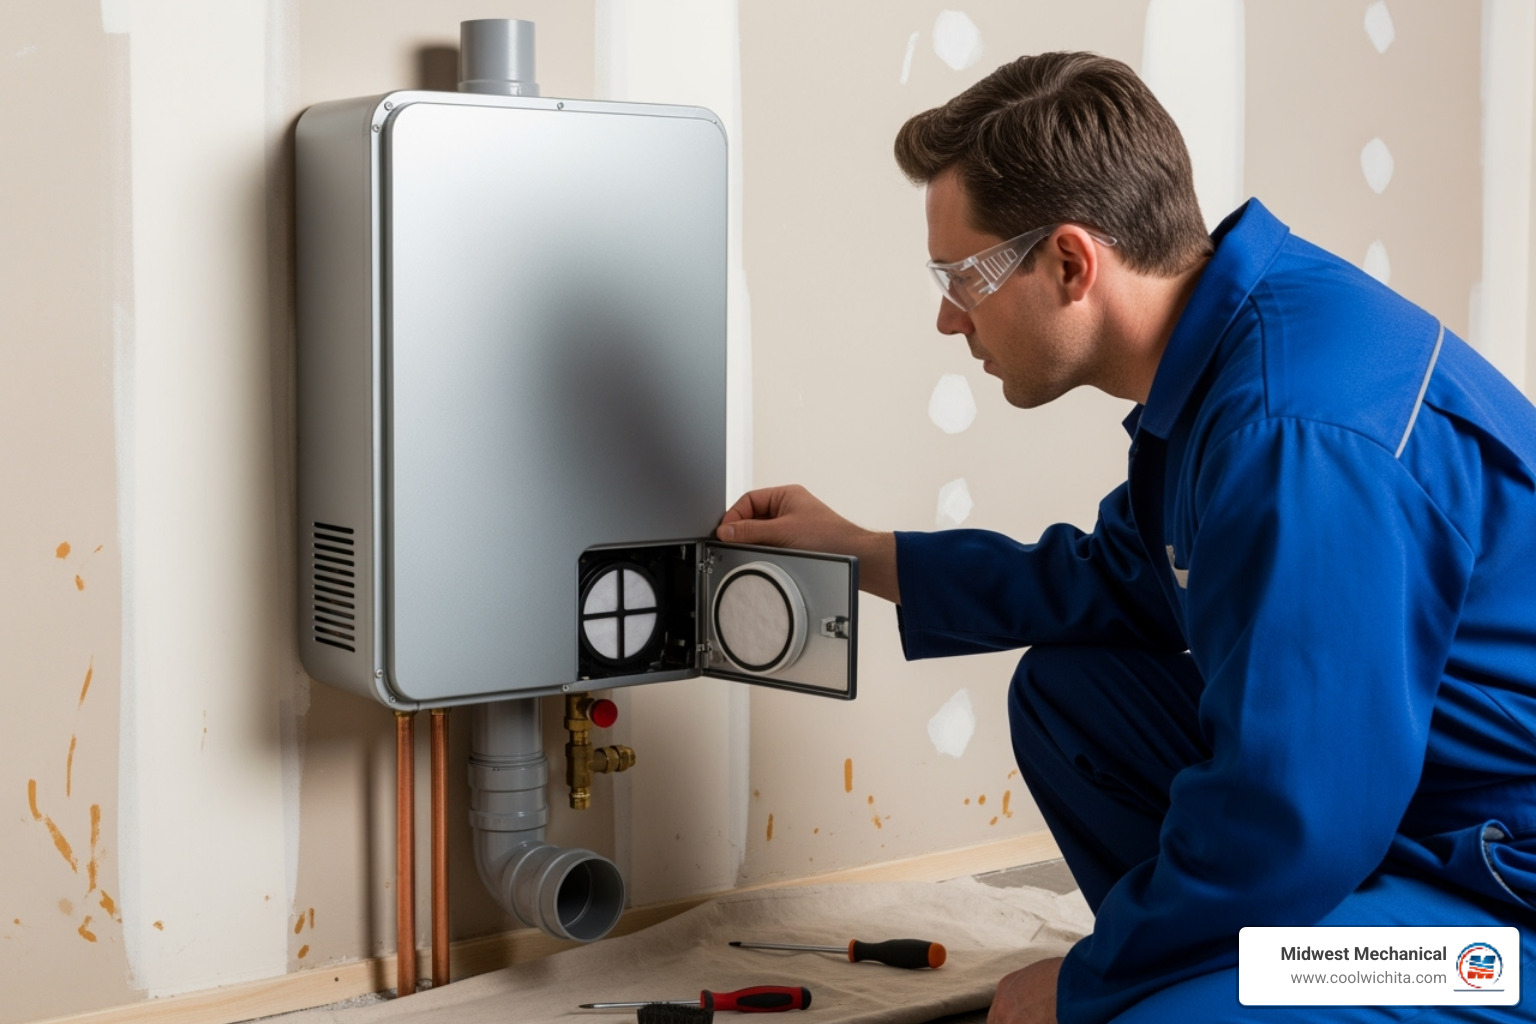
Checking your air intake filter is one of those quick tasks that makes a big difference. If your unit has one (not all do), it's usually easy to spot and even easier to clean. A dirty filter is like trying to breathe through a pillow - your water heater just can't get the airflow it needs for proper combustion. Most manufacturers recommend checking this every few months, especially if you live in a dusty area.
Keeping the exhaust vent clear might sound obvious, but you'd be surprised how often birds decide your vent pipe looks like prime real estate. A quick visual check every season can save you from bigger headaches down the road. Proper ventilation isn't just about efficiency - it's about safety, especially for gas-fired units that need to expel combustion gases.
Your home's water pressure plays a bigger role than you might think. Too much pressure puts stress on your tankless unit and can actually shorten its life. If your showers feel like fire hoses or your faucets seem overly aggressive, it might be worth having the pressure checked. Most homes do best with pressure between 40-80 PSI.
Here's where we really recommend bringing in the pros: annual professional inspections can catch things that even the most diligent homeowner might miss. Even if you're comfortable doing your own tankless water heater flush, having our certified technicians take a look once a year is like getting a physical for your water heater. We can check for gas leaks, inspect connections, test safety systems, and spot potential problems before they turn into expensive repairs.
At Midwest Mechanical, we've seen too many small issues turn into big problems simply because they went unnoticed. Our technicians serve the Wichita area and know exactly what to look for in our local climate and water conditions.
Frequently Asked Questions about Flushing a Tankless Water Heater
Over the years, we've helped hundreds of homeowners in Wichita and surrounding areas maintain their tankless water heaters. These are the questions that come up most often during our service calls:
What happens if you never flush a tankless water heater?
Think of mineral scale like plaque on your teeth - the longer you ignore it, the worse it gets. When you skip regular tankless water heater flush maintenance, mineral scale steadily builds up on the heat exchanger surfaces. This crusty buildup acts like a thick winter coat on your heating elements, making it incredibly difficult for them to transfer heat effectively.
Your poor water heater starts working overtime, consuming more and more energy just to heat water to the same temperature it used to reach easily. Those higher energy bills are just the beginning of your troubles.
The real problem comes later. All that extra strain eventually leads to component failure, blocked water passages, or even cracks and leaks in the heat exchanger itself. We've seen units that could have lasted 20+ years fail after just 8-10 years because they were never flushed. The repair costs for a damaged heat exchanger often exceed the price of a new unit.
Why did the water turn blue during the flush?
Don't worry - you didn't break anything! That blue water is actually completely normal and shows that your descaling solution is doing its job.
The acidic solution (whether you're using vinegar or a commercial descaler) reacts with the copper components inside your water heater's heat exchanger and connecting pipes. This chemical reaction temporarily dissolves tiny amounts of copper, which turns the water that distinctive blue-green color.
It's the same reaction you might see if you put a penny in vinegar and leave it there for a while. The blue color will completely disappear during your final fresh water rinse, so there's no need to panic when you see it happening.
Can I damage my tankless water heater by flushing it?
Unfortunately, yes - but only if you make some common mistakes that are easily avoided. We've seen well-meaning homeowners accidentally damage their units, which is why we always emphasize following the proper steps carefully.
The most dangerous mistake is using the wrong cleaning solution. Harsh chemicals or cleaners not specifically designed for tankless units can corrode internal components and contaminate your drinking water. Stick to white vinegar or approved descaling products.
Failing to rinse thoroughly is another problem we see. If you don't flush out all the cleaning solution with fresh water, those acidic residues can continue eating away at your unit's components long after you think you're finished.
Overtightening connections might seem like good practice, but it can actually crack valve bodies or strip threads, leading to expensive leaks. Snug is good enough - you don't need to muscle those connections.
If you feel uncertain about any part of the process, or if something doesn't look right during your flush, stop and give us a call. It's always better to ask for help than to risk damaging your investment.
Keep Your Hot Water Flowing
Think of regular tankless water heater flush maintenance like getting your car's oil changed - it's not exactly thrilling, but it's absolutely essential for keeping everything running smoothly. When you stay on top of this simple maintenance task, you're making a smart investment in your home's comfort and your wallet's wellbeing.
The math is pretty straightforward: a little preventive care now saves you from big headaches later. By keeping mineral buildup at bay, your unit will continue humming along at peak efficiency, which means lower energy bills month after month. Even better, you'll dramatically extend your tankless water heater's lifespan - and these units can already last over 20 years when properly maintained!
Nobody wants to deal with a water heater emergency, especially during a cold Kansas winter. Regular flushing helps you avoid those midnight calls to repair technicians and prevents the kind of costly repairs that can really put a dent in your budget.
Here's the thing though - while we've given you all the tools and knowledge for a DIY approach, there's no shame in calling in the professionals. Sometimes it's worth the peace of mind to know the job is done right the first time.
At Midwest Mechanical, our certified technicians have seen it all when it comes to tankless water heaters throughout the Wichita area. Whether you're in McConnell AFB, Rose Hill, or Sedgwick, we're here to help keep your home comfortable with reliable service you can count on. We understand that your time is valuable, and we're committed to providing transparent, honest service that fits your needs.
Ready to ensure your tankless water heater keeps delivering endless hot water for years to come? Learn more about our water heater services in Wichita, KS and find how we can help maintain your home's comfort with professional care and expertise.
Customer Testimonials
Hear from satisfied customers who trust us for reliable HVAC and plumbing service across Wichita.


Plus, the technician, Lee was very professional, knowledgeable and informative.
We will definitely be doing business with them sometime again in the past.


I'm prompt to my appointment. Thank you Midwest Mechanical.


We have partnered with GoodLeap to offer flexible payment options for your project. GoodLeap uses a soft credit check until funding and the highest score from all 3 bureaus to see if you qualify. It also takes just a few minutes to get started.


Service Areas
.svg)


